Saving and history
Save a result and it is still there next week: the stair you priced on Monday, the header you sized at the walk-through. Give it the job's name and every result for that job is kept together. History is a record you read back, not a file you reopen. It stays on this phone.
Step by step
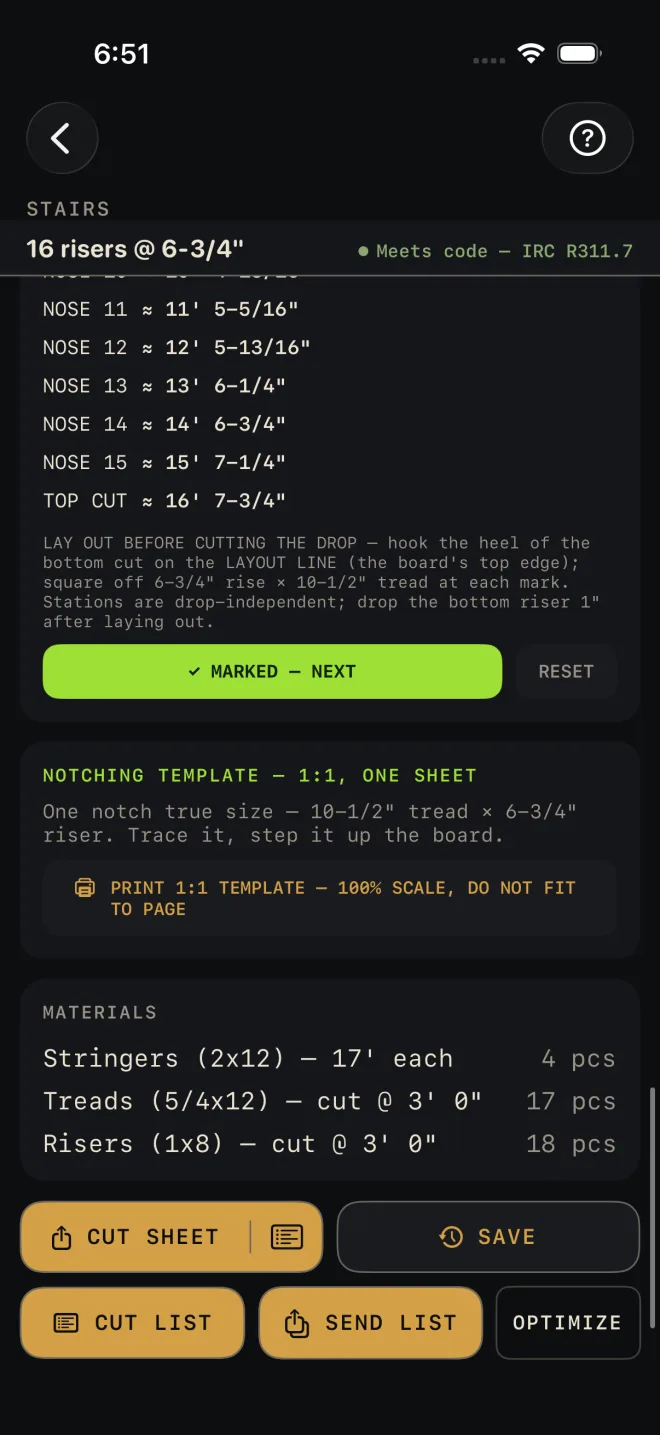 2
2
- Enter your own measurements. If every input is still the sample value there is no job to save. Tapping SAVE then shows "Enter your job's numbers first" for a moment and saves nothing.
- Scroll to the bottom of the calculator and tap SAVE.
- A box headed "Name this result" appears. Type the job's name, such as the example it suggests, "Kitchen reno", and tap Save. Or tap Skip to save without a name. Cancel saves nothing.
- The button reads SAVED with a tick for a moment. The result is on the phone from that instant.
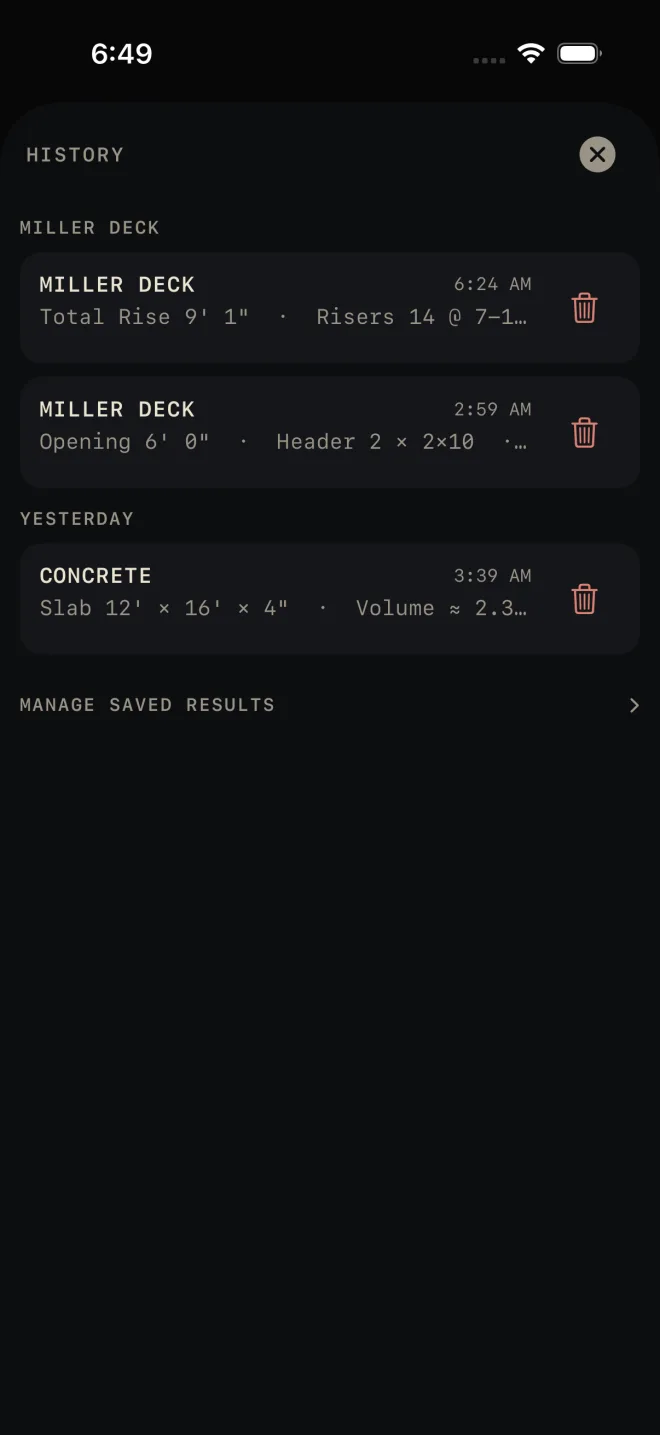
- To read it back, open the calculator list and tap History at the bottom, under Settings.
The History screen
 1
2
3
4
5
1
2
3
4
5
- Named results are grouped by job. Every result saved under the same name sits under one heading, whichever calculator it came from and whichever day you saved it. Capitals do not matter: "Miller deck" and "MILLER DECK" are the same job. The job you saved to most recently is at the top.
- Results without a name are grouped by day below the jobs: TODAY, YESTERDAY, then the date. Newest first.
- Each row shows the job name, or the calculator's name if you skipped the name, then the time it was saved and the first three figures. Tap the row to open it.
- The bin deletes that one result. It asks "Delete this saved result?" first. There is no undo.
- MANAGE SAVED RESULTS opens to show CLEAR ALL. That asks "Clear all saved results?" before it deletes everything. It cannot be undone.
Opening a saved result
Tapping a row opens a page headed with the job name and the calculator it came from, or just the calculator's name if you skipped the name, and the date and time. Under DETAILS is every figure that was saved, written exactly as the calculator showed it at that moment. These are the same lines that go in the inputs table of a cut sheet. DELETE at the bottom asks "Delete this saved result?", then removes the result and takes you back to the list.
A saved result is a snapshot. Opening it does not reopen the calculator or put the numbers back into it, and there is no drawing or material list with it. To work the job again, open the calculator and enter the figures from the saved page. If you need the drawing and the material list kept, share a cut sheet as well.
How much it keeps
History holds the 200 most recent results. Saving one more drops the oldest. Results are stored on this phone only.
If it doesn't work
- SAVE shows "Enter your job's numbers first". Every input is still the sample value. Change any input to your own measurement and tap it again.
- The button reads SAVE — PRO, or History shows a lock. Saving needs Pro. Tap the button to see the upgrade screen.
- History says "No saved results yet". Nothing has been saved on this phone. Tap SAVE on a calculator first.
- A job has split into two groups. The names are spelled differently. Apart from capitals, names must match exactly, including spaces. A saved result cannot be renamed, so save it again under the right name and delete the stray one.
- You tapped SAVE twice and got one result. The button is switched off while it reads SAVED so a double tap cannot save the same thing twice.
- An old result has gone. The list keeps the newest 200.